How to build a custom environment for Jupyter in Docker
If you have been doing software development in recent years, you’ve probably come across the use of containers not only for deployment, but also during development to ensure that your build is completely reproducible in different systems.
Also very popular in data science, data visualization and related circles is using Python and Jupyter Notebooks and Jupyter Lab to explore and experiment with data. Some people criticize Jupyter for often result in unreproducible work, something that is really important for the scientific method, because the development environment may differ from the one reproducing it and the cells could be executed out of order. For instance, in an experiment made by the Jetbrains Datalore team last year which downloaded almost 10 million notebooks from Github, they found 36% of those notebooks to be inconsistent, that is, run in a non linear order.
On the other hand, if your environment is well defined in a Docker container and you make sure to do the good practice of executing the cells in the proper order, notebooks can be completely reproducible.
It might not be so obvious how to do it, however. So here is a step by step guide on how to use Jupyter Lab and Jupyter Notebook inside Docker with the Python packages of your choice.
This guide is written with a GNU-Linux based system in mind and has been tested on Ubuntu 18.04 and 20.04. It should also work on other GNU-Linux based systems. However, if you are using Windows or MacOS, you will have to make some adaptations for it to work, mainly concerning the command line operations and environment variables, but those are not covered in this guide.
Preparations
Before we begin, make sure you have installed Docker and Docker Compose.
Choosing a base image
The Jupyter Docker Stacks do provide some ready to run images and some recipes for creating your own Docker image inheriting from those (what they call a child Docker image).
For that, we must first choose a base Docker image to inherit from. For
this exercise we are going to use jupyter/scipy-notebook, which
includes Pandas, NumPy
and a few other things. However, take a look at the
image selection
section of the Jupyter Docker Stacks documentation to see other options.
Then we create a Dockerfile to build the custom Docker image and
add the following line to define the base image:
FROM jupyter/scipy-notebook
If you don’t want to create a new Dockerfile from scratch, you can
also clone
this example repository
from Github, which has a Dockerfile ready to use.
Setting up the locales
If you are ever going to work with data from locales other than the US, you should probably set up one or more other locales. For example, this will make it easy to work with different decimal number separators or with weekday and month names in different languages.
For this exercise, we are going to configure the system locales to use
both en_US.UTF-8 (English, US) and pt_BR.UTF-8 (Brazilian Portuguese)
locales. The following section of the Dockerfile does just that.
# install the locales you want to use
RUN set -ex \
   && sed -i 's/^# en_US.UTF-8 UTF-8$/en_US.UTF-8 UTF-8/g' /etc/locale.gen \
   && sed -i 's/^# pt_BR.UTF-8 UTF-8$/pt_BR.UTF-8 UTF-8/g' /etc/locale.gen \
   && locale-gen en_US.UTF-8 pt_BR.UTF-8 \
   && update-locale LANG=en_US.UTF-8 LC_ALL=en_US.UTF-8 \
Choosing your Python packages
Next, we are going to choose the Python packages that are going to be
available to Jupyter inside the environment. In this example, we choose
the data visualization tool Plotly and the
map plotting package
Folium. This is the
section of the Dockerfile where we define that.
# install Python packages you often use
RUN set -ex \
   && conda install --quiet --yes \
   # choose the Python packages you need
   'plotly==4.9.0' \
   'folium==0.11.0' \
   && conda clean --all -f -y \
   # install Jupyter Lab extensions you need
   && jupyter labextension install jupyterlab-plotly@4.9.0 --no-build \
   && jupyter lab build -y \
   && jupyter lab clean -y \
   && rm -rf "/home/${NB_USER}/.cache/yarn" \
   && rm -rf "/home/${NB_USER}/.node-gyp" \
   && fix-permissions "${CONDA_DIR}" \
   && fix-permissions "/home/${NB_USER}"
Replace or add it with the Python packages and Jupyter lab extensions you want.
Building the container
This step is very easy to do, but may take a very long time to finish. Just run the following command:
$ docker build --rm -t docker-jupyter-extensible .
and then go have a meal or do something else and come back after a while.
Fixing file permissions
A common problem when mounting a folder from the host inside the container is that the file owners often do not match, so you end up either not able to access the folder or having it read-only. To fix that, we need to set up the user and group used inside the container to have the same id numbers as the user and group you are using on the host. It may sound complicated, but with those images it is really easy to do.
Just create a file named .env by running the following command:
$ printf "UID=$(id -u)\nGID=$(id -g)\n" > .env
This will allow you to use the notebooks folder both inside and
outside the container.
Running the container
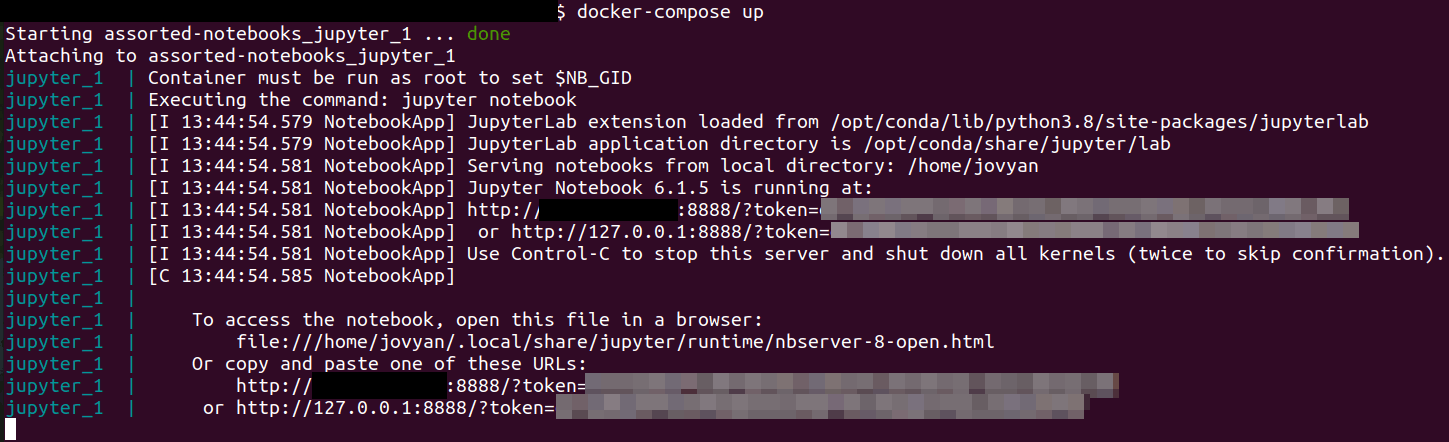
We are good to go! Every time you want to start Jupyter, just run the container with the command:
$ docker-compose up
You should see the messages from the container in the terminal. If
everything goes right, you should see a link starting with
http://127.0.0.1:8888 that also contains an access token. Open this
link on a browser to use Jupyter Notebook. If you want to use Jupyter
Lab instead, just change the beginning of the URL to
http://127.0.0.1:8888/lab, but keep everything after it, including
the access token.
To check that the packages have been properly installed and configured, just open a new notebook and import them. See, for instance, Plotly Express:
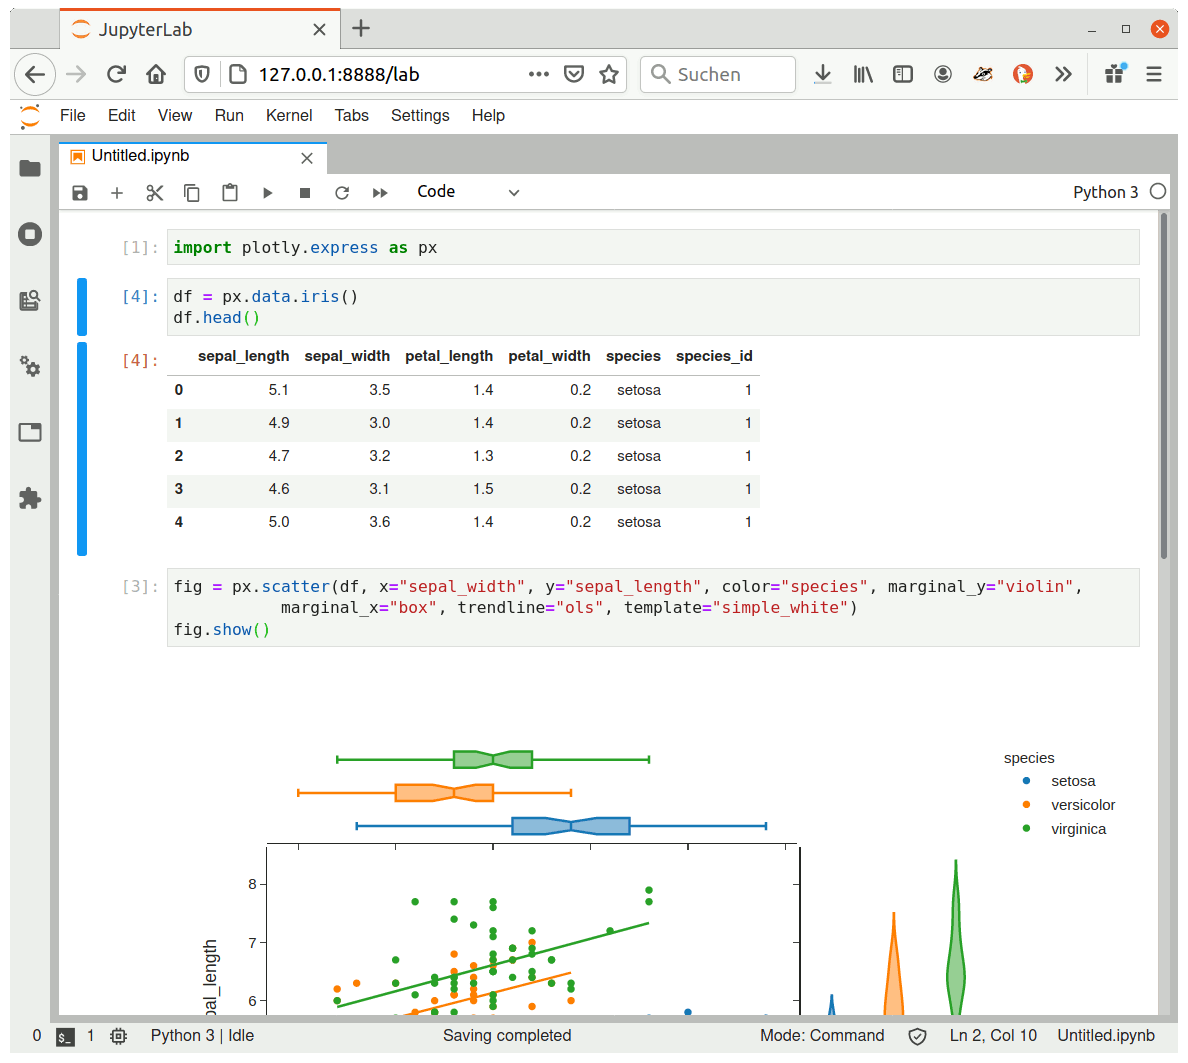
Now have fun with your new Jupyter Lab or Jupyter Notebook!
If later you want to add some new packages, just go back to the “choose your packages” step, make your desired changes and follow from there, building the container again.